View and manage users
You can manage your team's user accounts here.
Feature overview
Add, delete, and find users
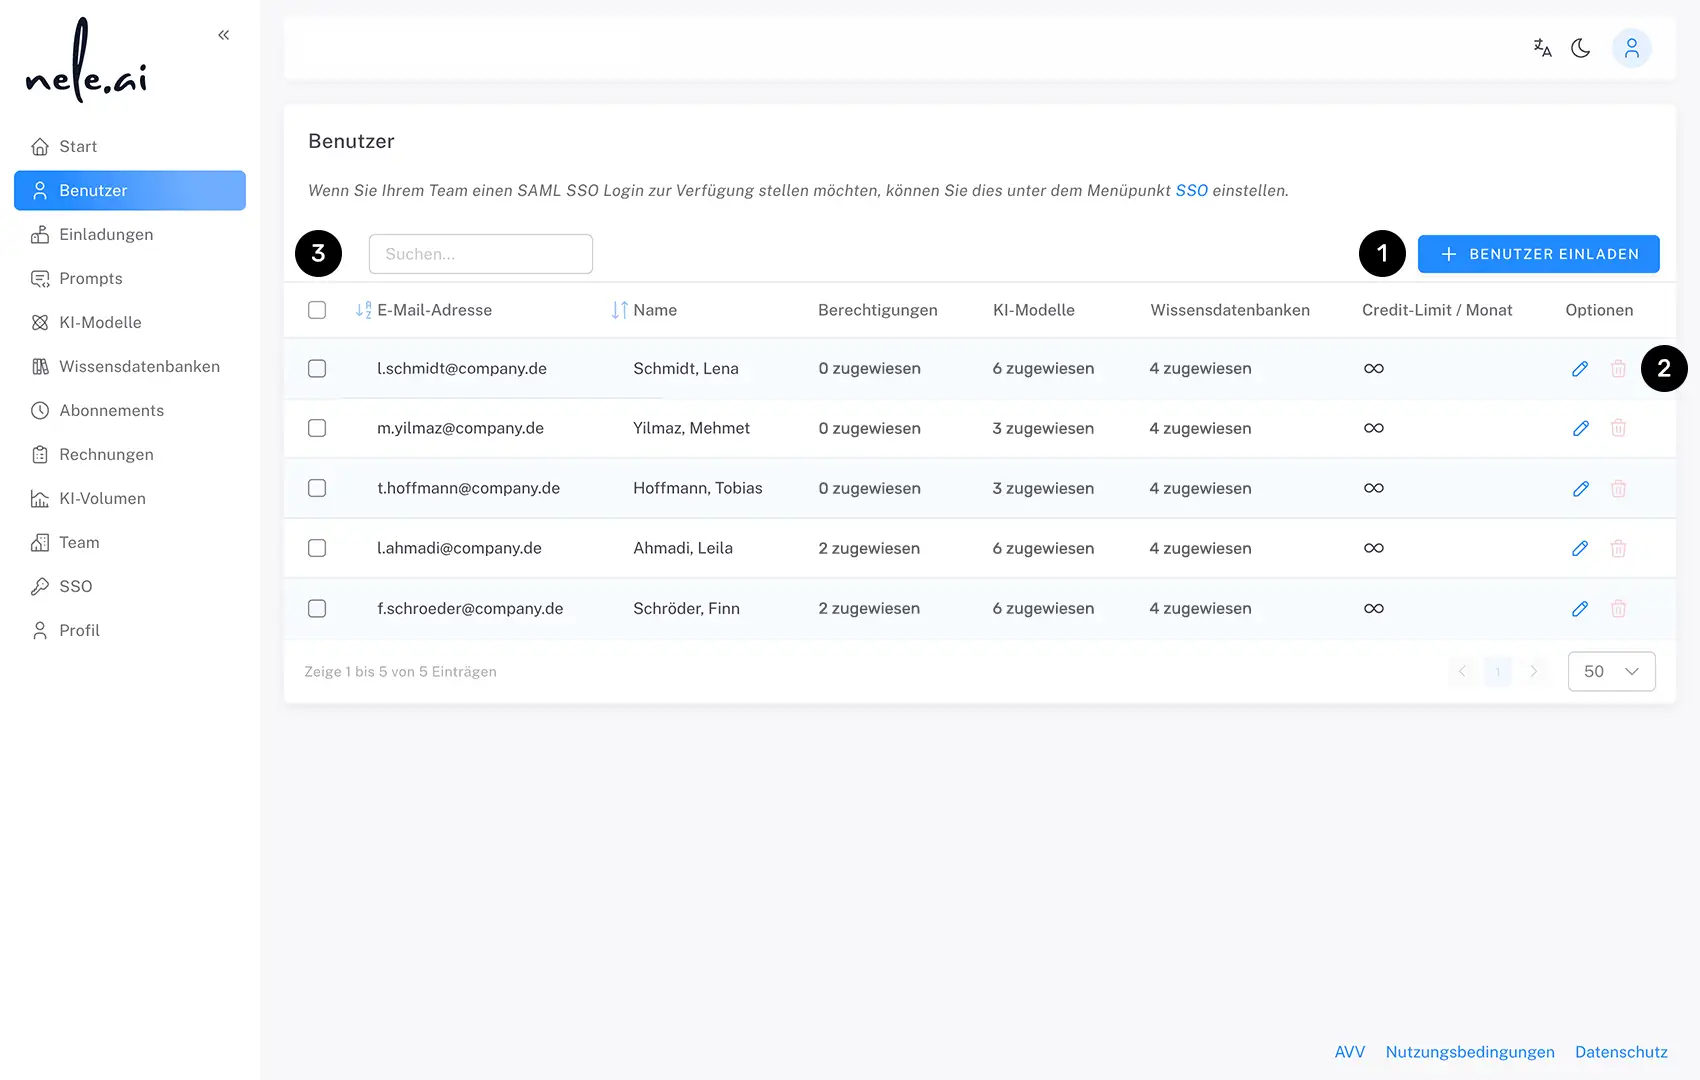
Use the “Invite user” button to add a new user (1). You will be redirected to the “Invitations” section. Removing a user is done via the “Delete” section (2) settled.
With the search function (3) You can quickly and easily find users that have already been created. When you enter a search term, the user overview only shows the entries that match your search.
Assigning settings and permissions
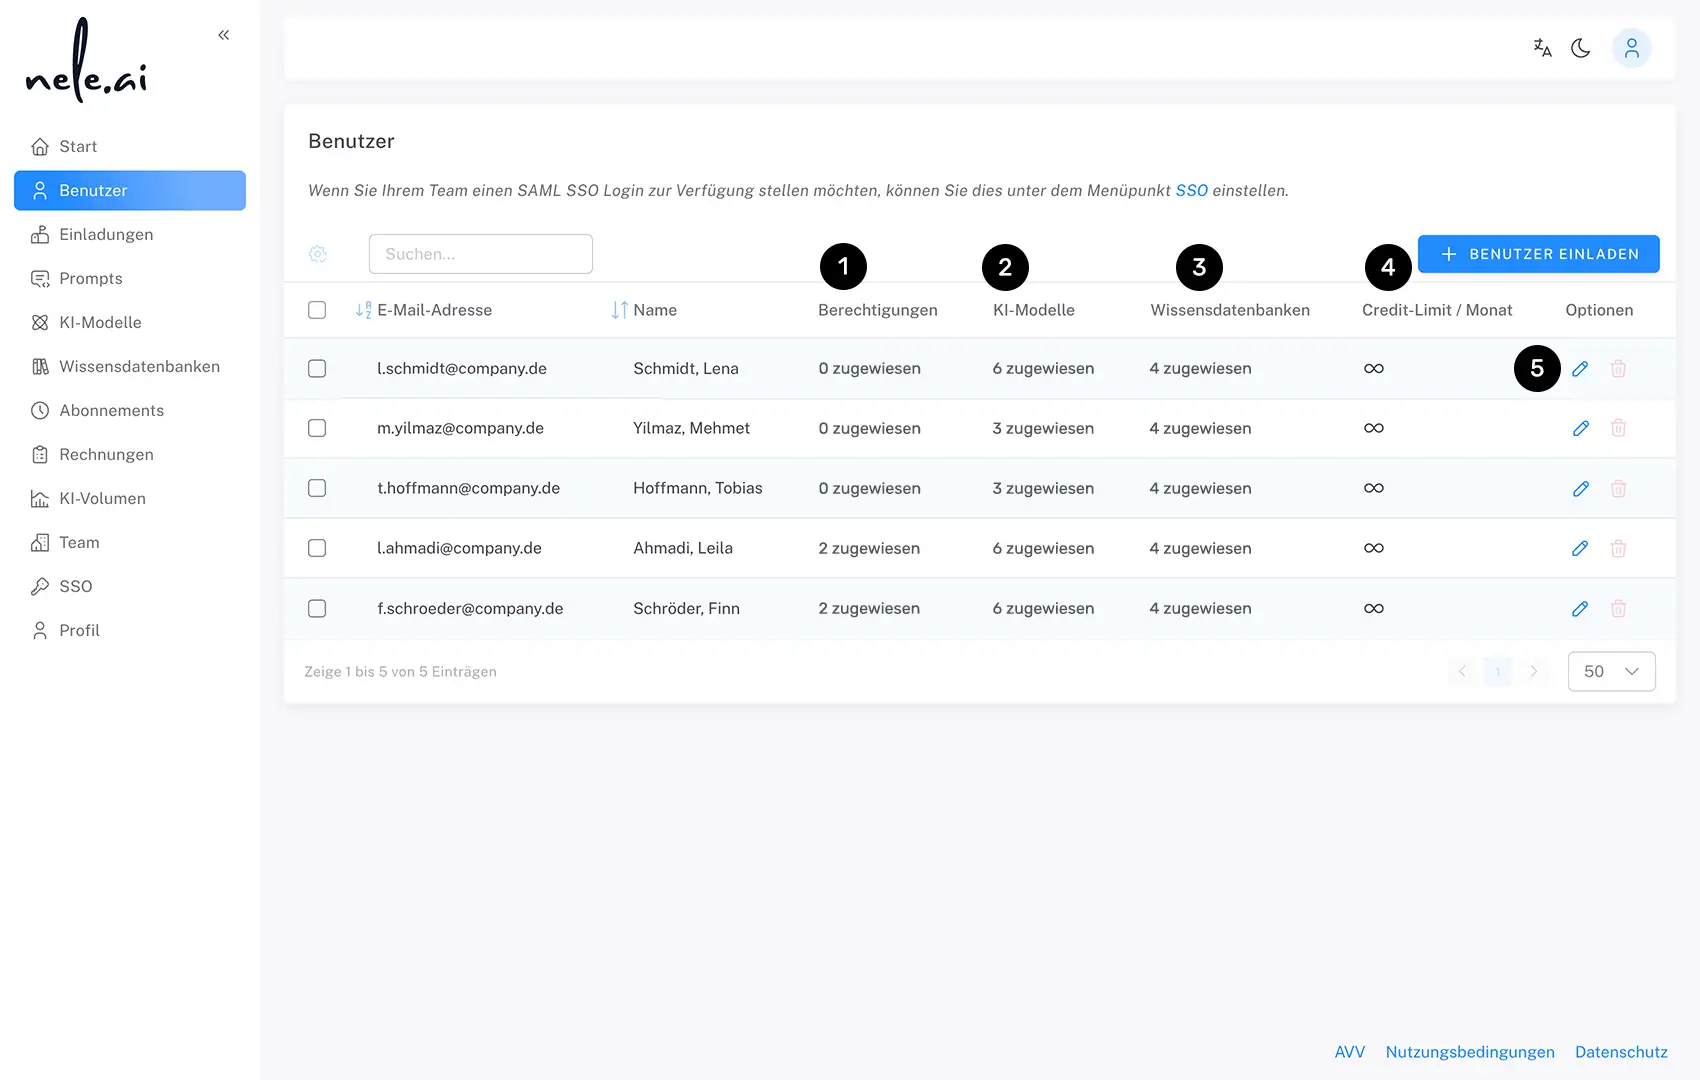
You can assign the following properties to each user:
Permissions within the admin area (1)AI models that can be used by the person (2) as well as knowledge databases (3). A credit limit per month can also be set here for each user (4). Click on the respective pencil icon for the setting.(5).
permissions
Here you have the option to assign permissions to the corresponding user. There are three categories of authorization to choose from:
- permission to generate an API key
- assigning authorizations within the admin area
- permissions for knowledge databases.
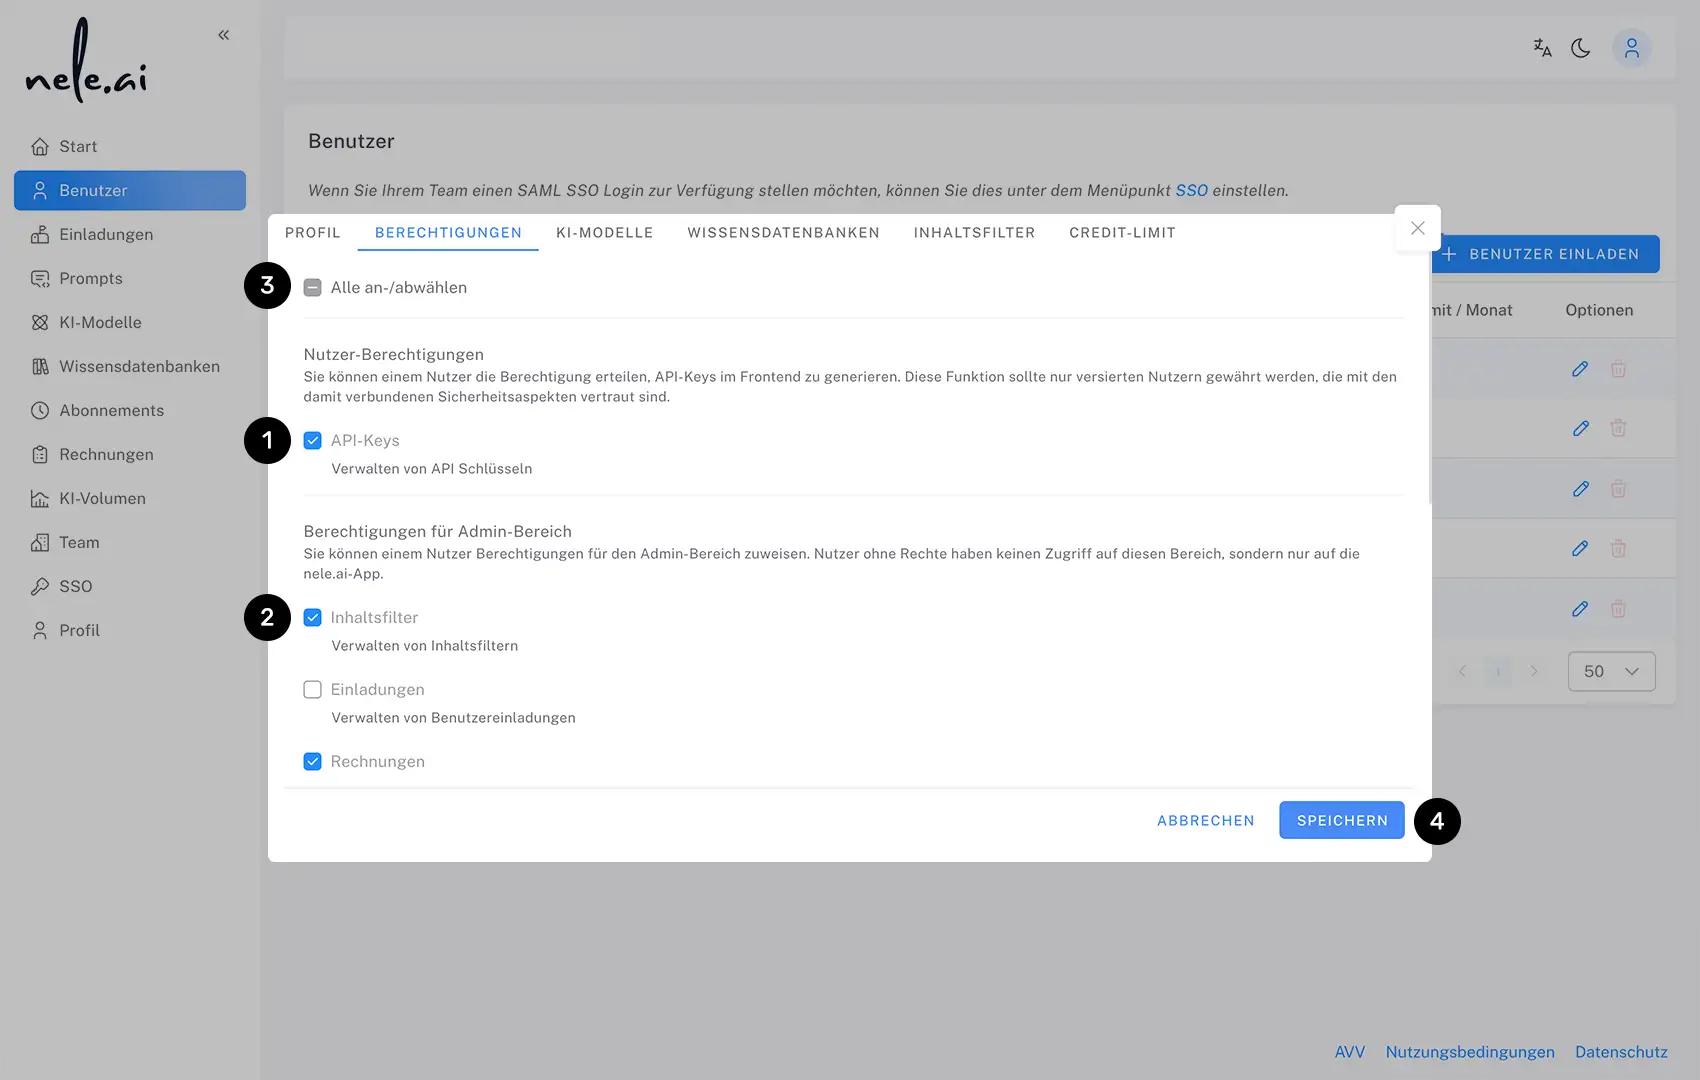
Permission to generate an API key
In the program settings of nele.ai, users have the option to generate an API key. Read more about this in the appropriate manual entry.
Click on the checkbox (1) in the permission settings of the admin area to allow the user to generate a key or prevent this.
Admin area permissions
Click on a checkbox to the left of the respective entries (2)to give the user access to the appropriate area. The unselected areas are not visible to users without rights.
Select “Deselect all” (3)to allow all areas at once or to withdraw permission for all areas at once. This also allows you to adjust the checkboxes in the categories “Authorization to generate an API key” and “Assign permissions to knowledge databases.”
Send your final invitations via the “Send invitations” button (4) or adjust additional settings.
Assigning permissions for knowledge databases
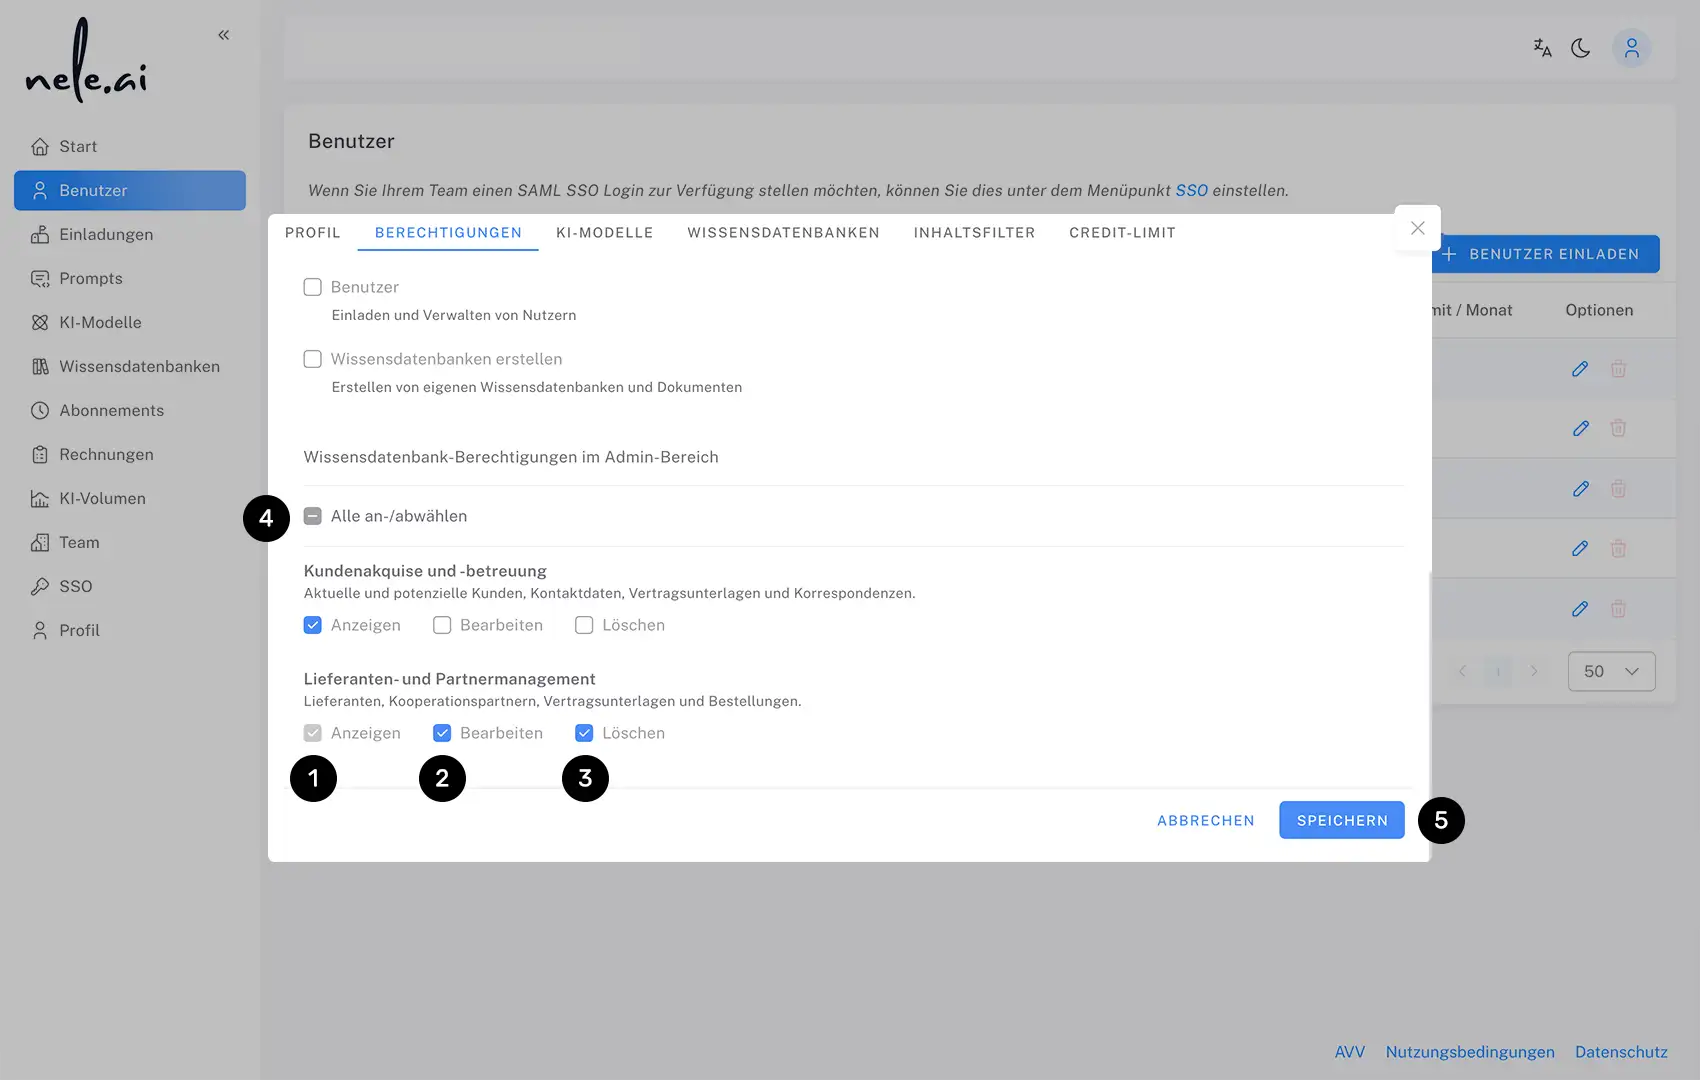
The permission settings for knowledge bases are in the same overlay. To do this, scroll down a bit further. Here you can set what options a user has with regard to viewing and editing specific knowledge databases.
Select “View” (1) for a knowledge database to simply make this knowledge database visible to the user. This is the lowest possible level of authorization.
In addition, a user can edit a knowledge database separately from each other (2) or the deletion of one (3) be conceded.
Select “Deselect all” (4)to allow all areas at once or to withdraw permission for all areas at once.
Finally, confirm your selection with “Save” (5).
Allowed AI models
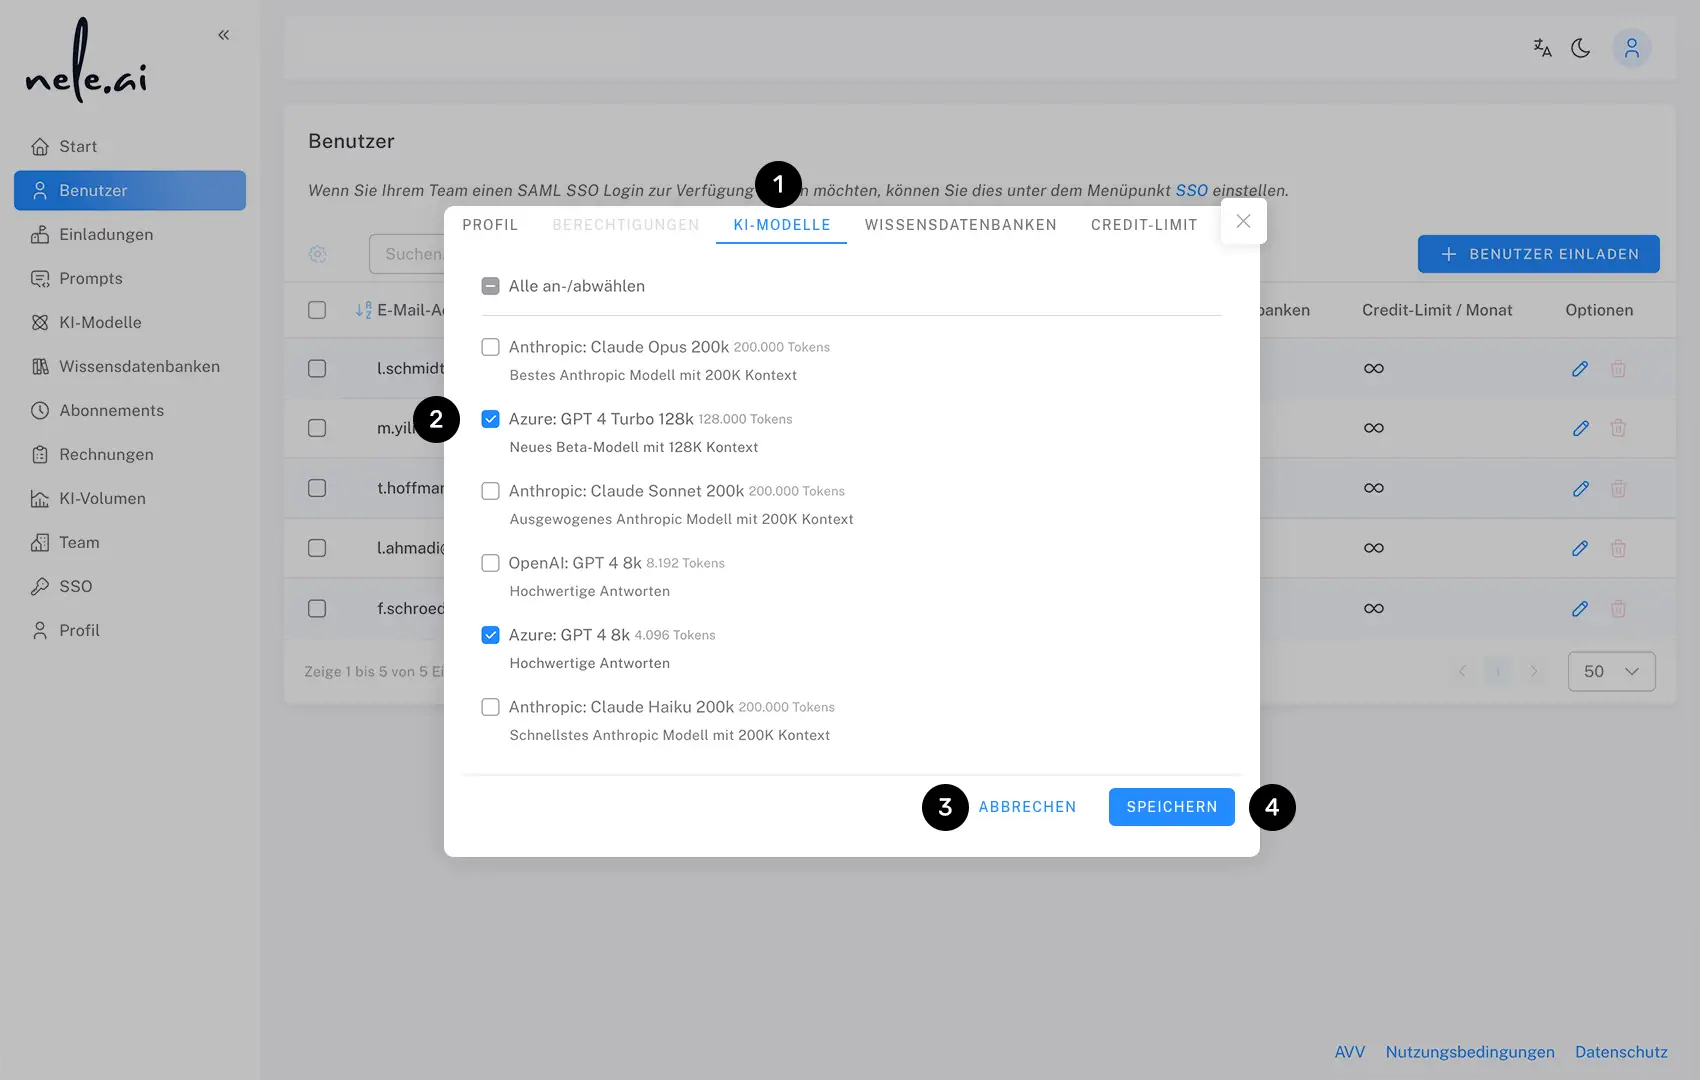
Click on the pencil icon on the respective entry for which you want to adjust the allowed AI models. An overlay opens, in which you then select the item “AI models” in the navigation above (1).
Use a checkbox to the left of the respective entries to select which models are assigned to the corresponding user (2). Finally, confirm with “Save” (3) or select Cancel (4) to complete the process without saving.
Allowed knowledge bases
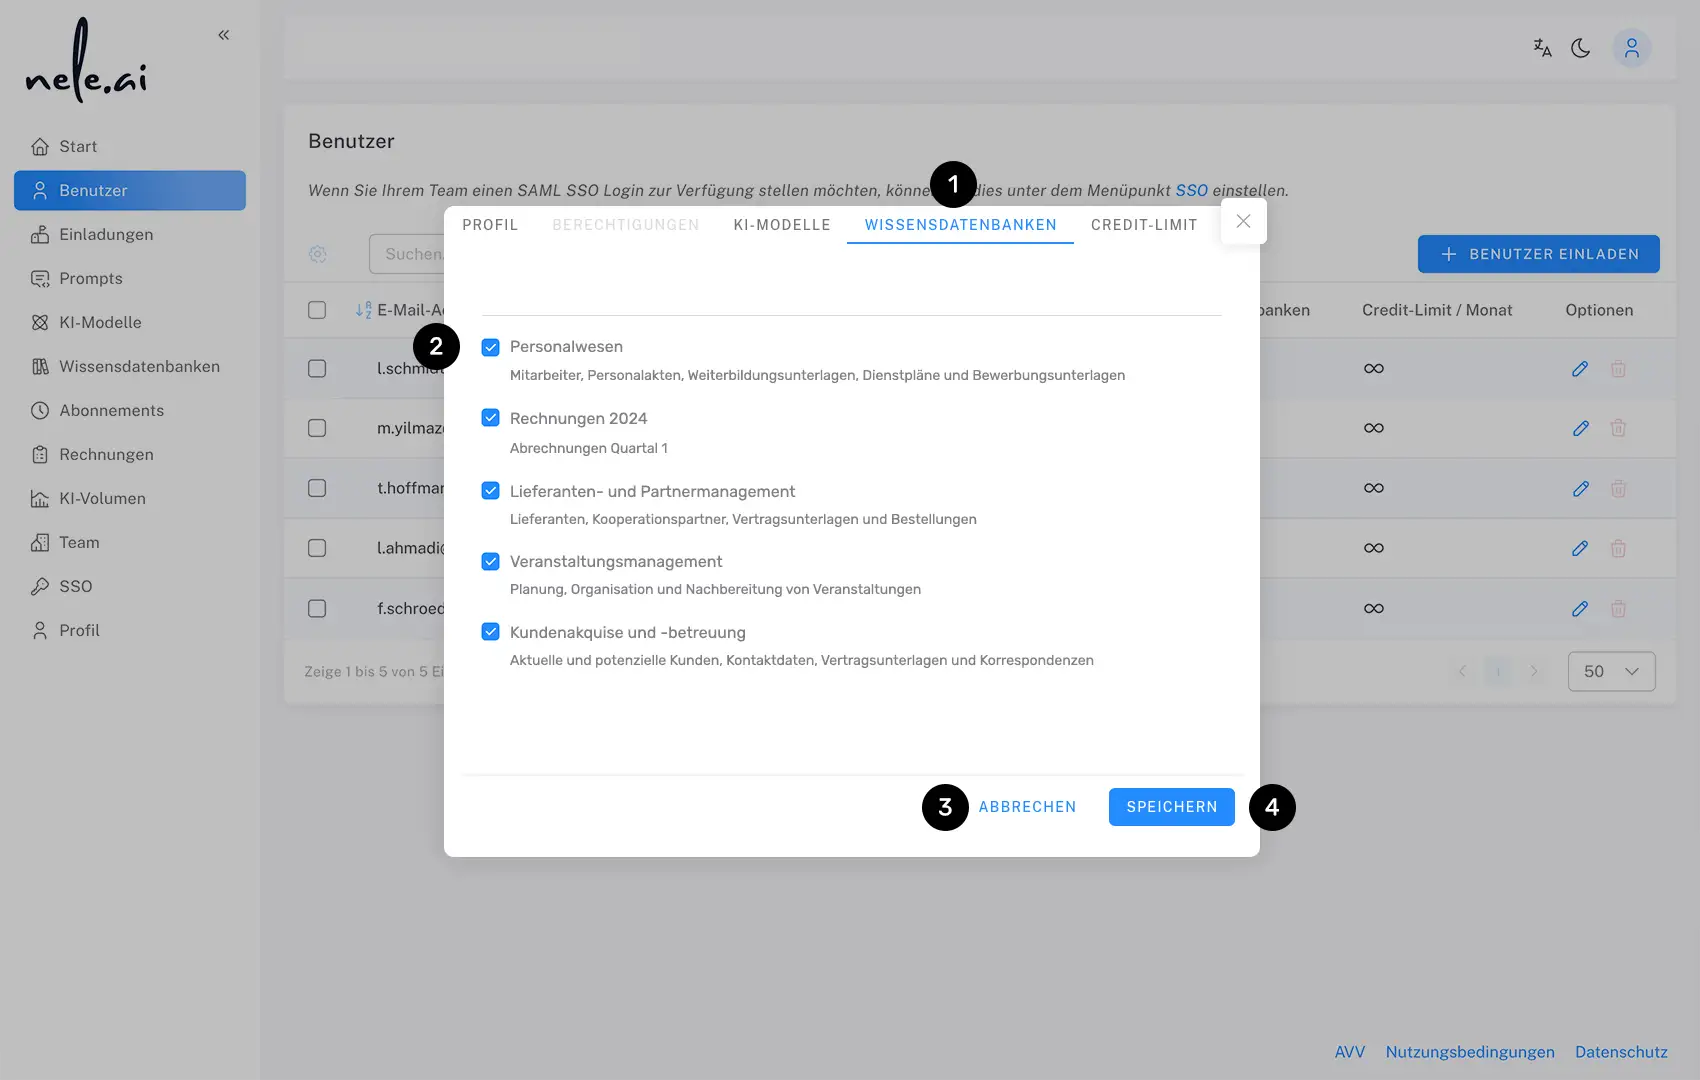
Click on the pencil icon on the respective entry for which you want to adjust the allowed knowledge databases. An overlay opens, in which you then select the “Knowledge Databases” item in the navigation above (1).
Use the checkbox to the left of the respective entries to select which knowledge databases are assigned to the corresponding user (2). Finally, confirm with “Save” (3) or select Cancel (4) to complete the process without saving.
Set credit limit
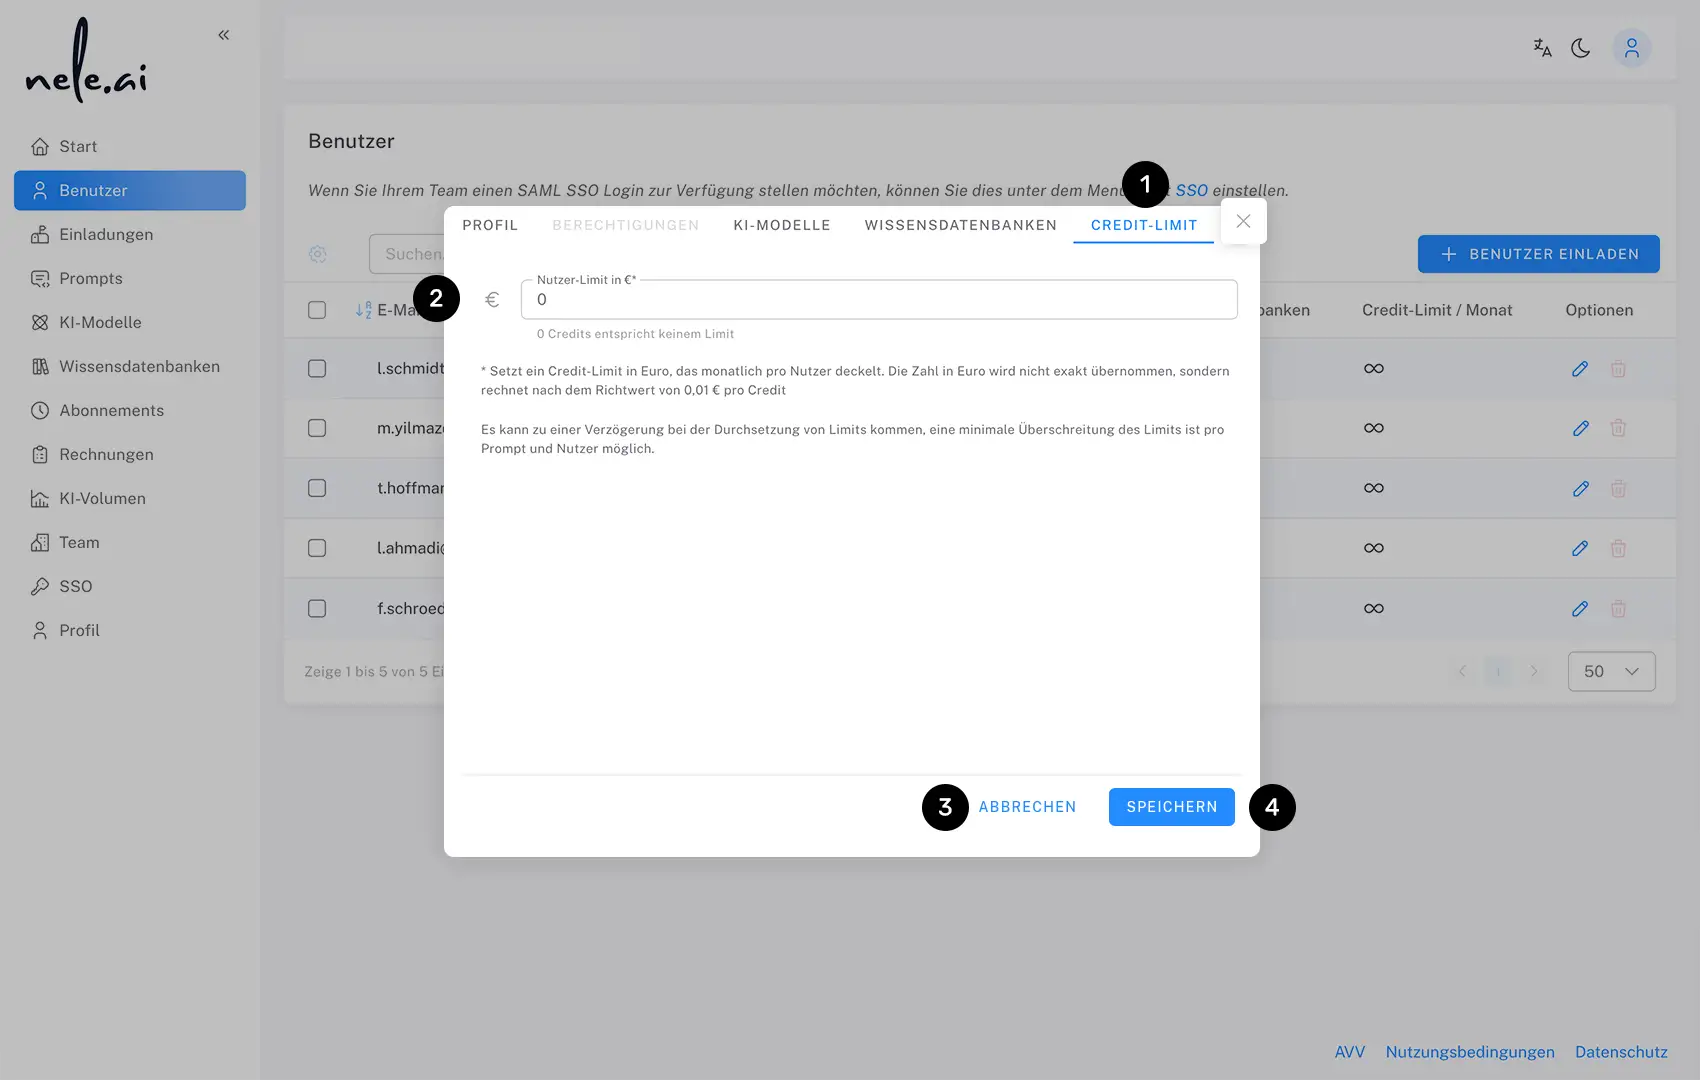
Click on the pencil icon on the respective entry for which you want to set or adjust a credit limit. An overlay opens, in which you then select the “Credit Limit” item in the navigation above (1).
For full cost control, set a credit limit that caps the monthly consumption of the respective user (2). 0 euros does not correspond to any set limit. Finally, confirm your entry with “Set limit” (3) or select Cancel (4) to complete the process without saving.
Manage multiple users at the same time
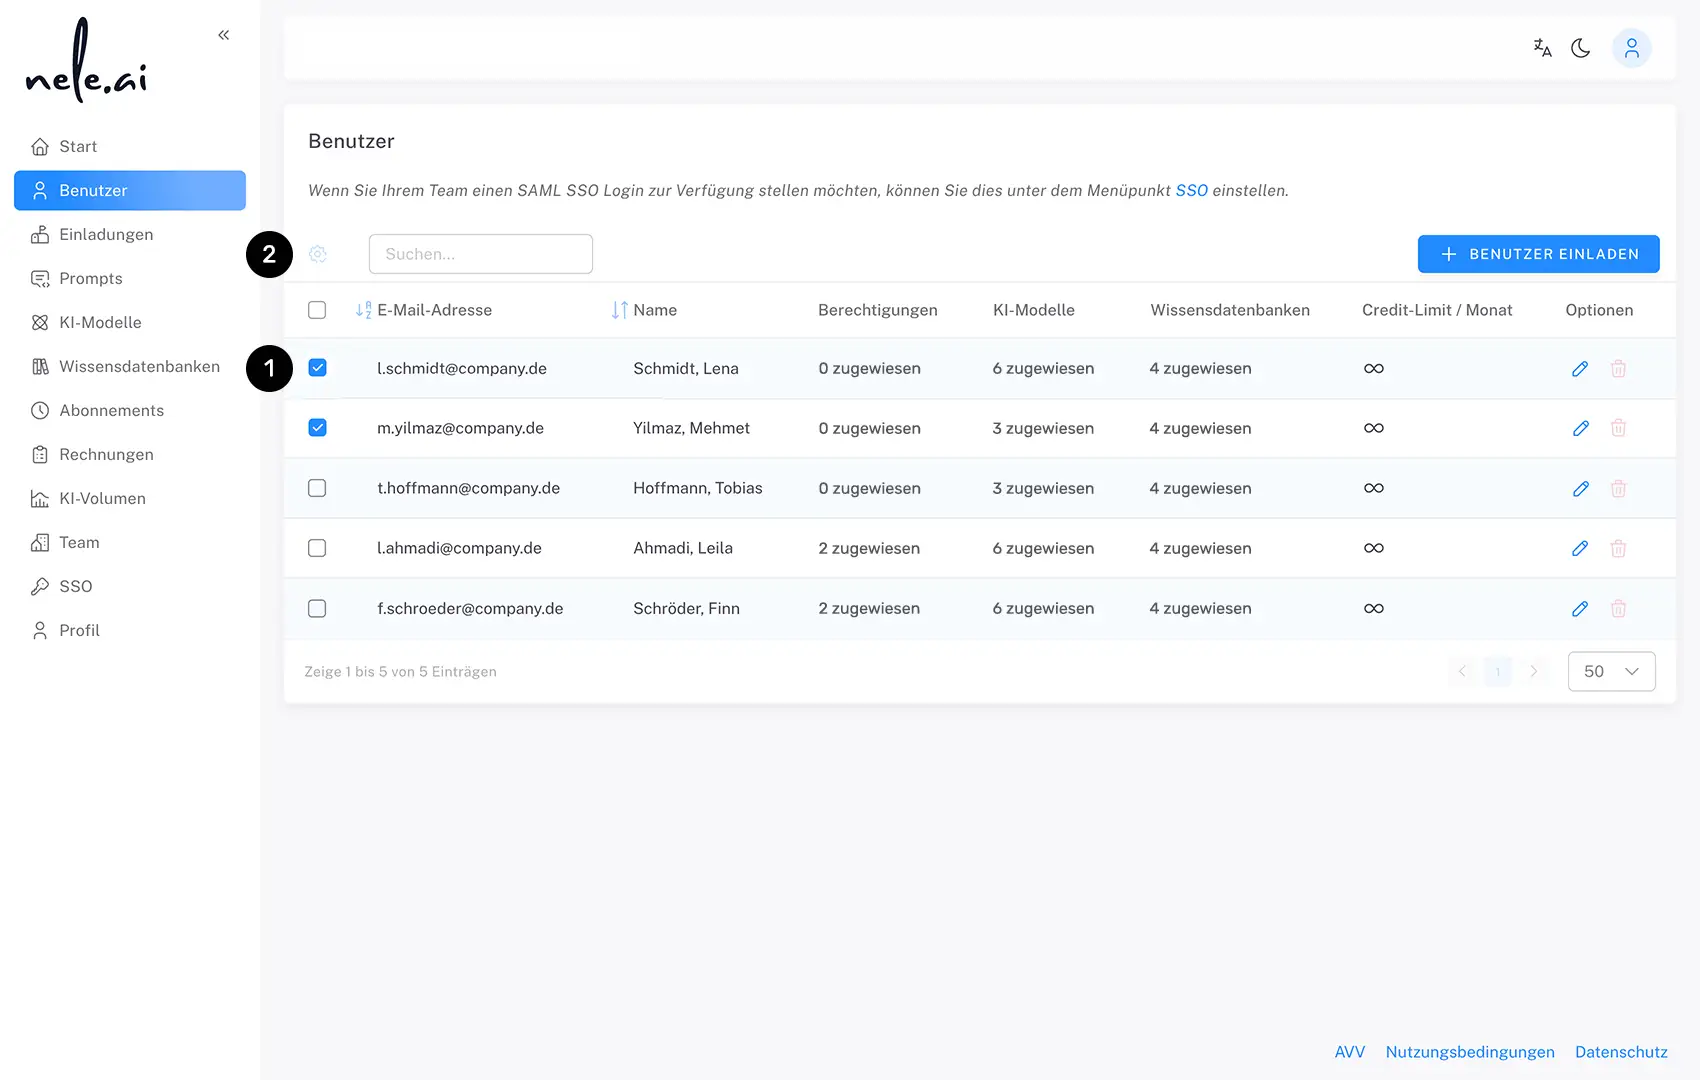
If you want to adjust the same settings for several users at the same time, click on the checkbox to the left of the corresponding columns and make your user selection first (1). Then click on the gear icon (2) and select the desired action you would like to take from the drop-down menu.


